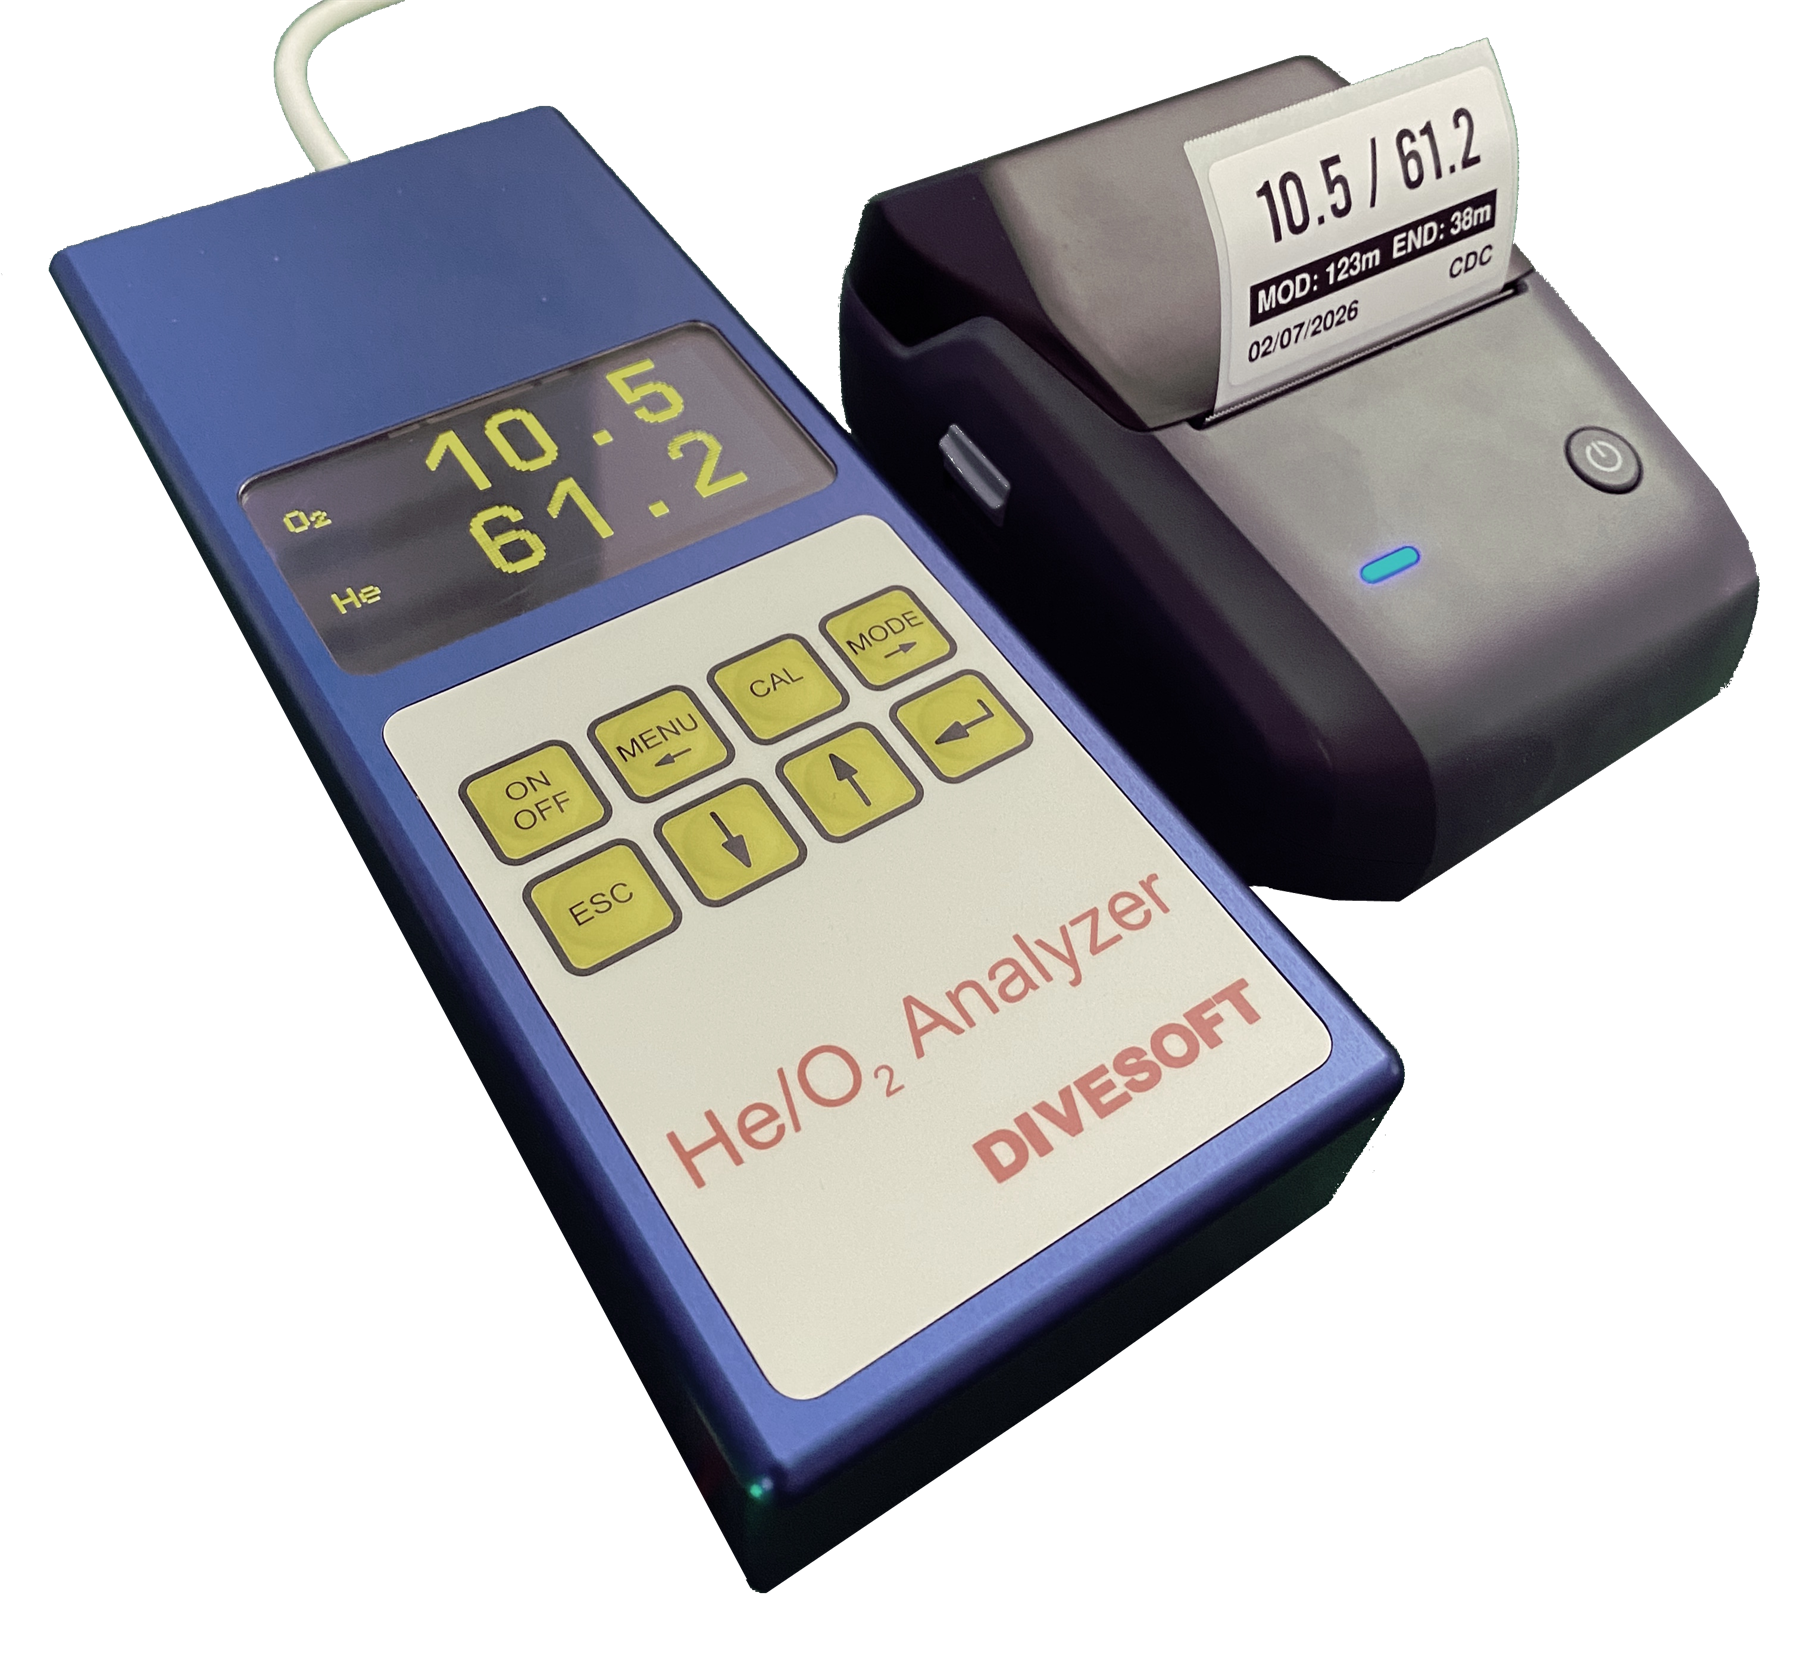
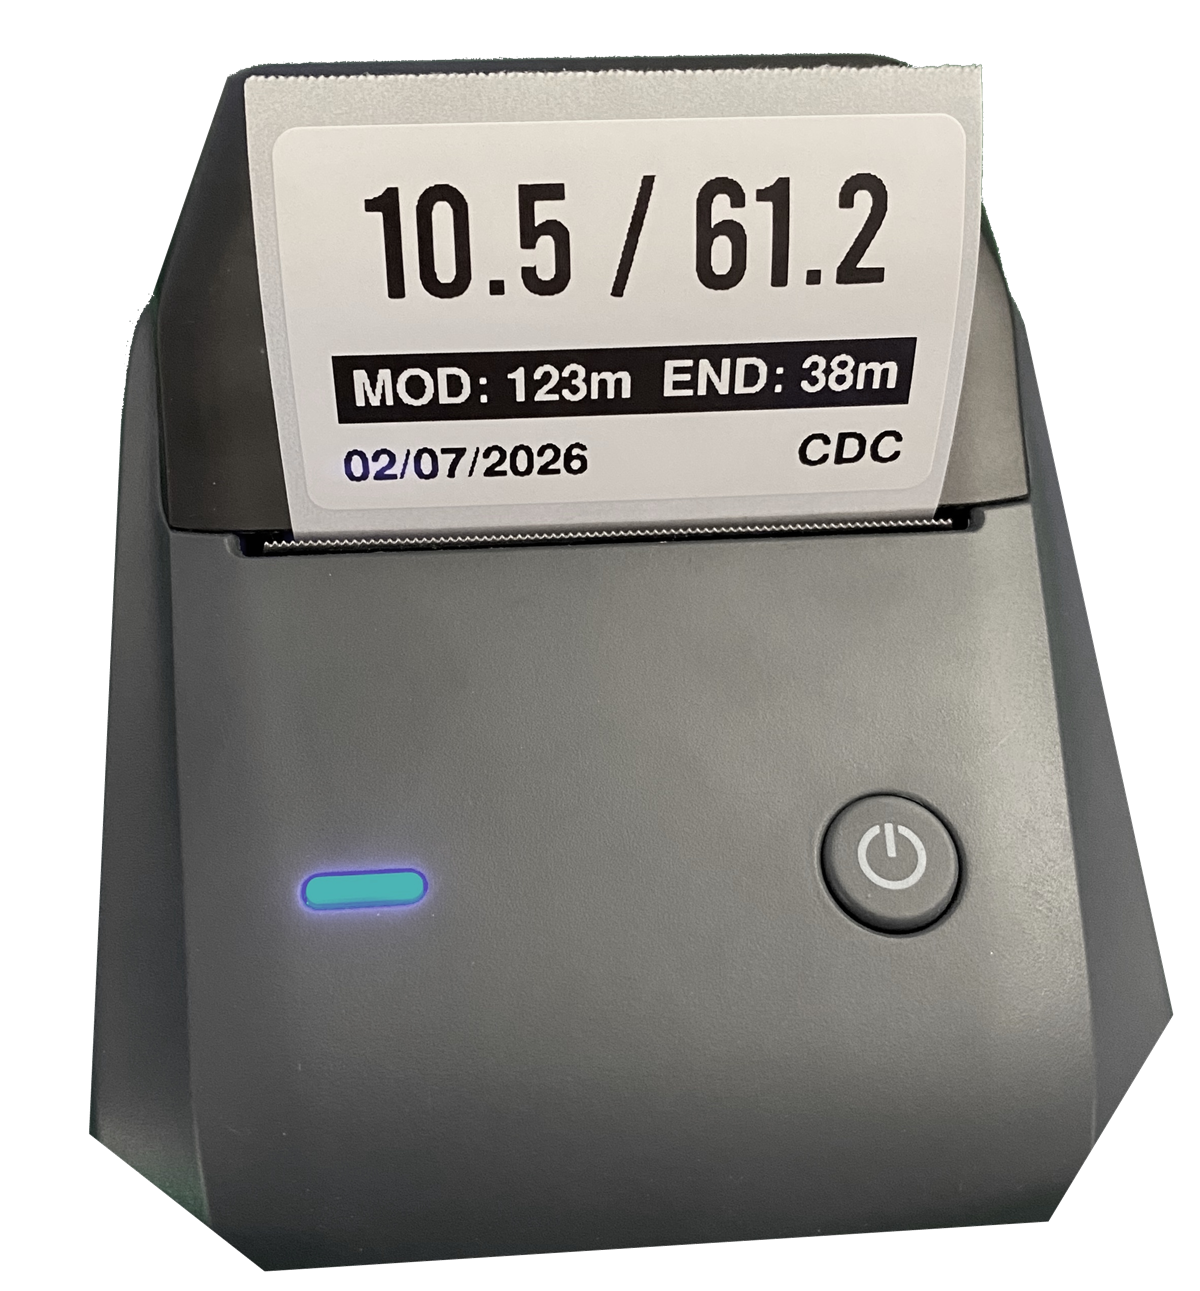
Trimix analyser readings to Niimbot labels
Trimix Analyser Connector
Big dives mean lots of cylinders to analyse, check, mark, and hand around. Handwritten tape can get messy fast, especially when everyone is prepping at once. This independent ESP32-S3-Zero adapter connects a Divesoft Trimix analyser to a supported Niimbot Bluetooth printer, so clear analysis labels come straight out of the workflow.
Nitrox-style labels are free. Helium and Trimix label printing is a Pro feature. The public installer and Pro checkout open in a few days after the final release firmware and production payment keys are verified.
Launching in a few days
Get an email when the Trimix Analyser Connector release is ready.
The adapter firmware, public installer, production checkout, and Trimix Pro activation flow are being kept closed while the final build is verified. Sign up here and I will send a short release email when it is ready to install.
- No flashing or Pro purchase is needed yet.
- The launch email will include firmware, wiring, printer, and activation notes.
- Your address is used only for this release notification.
Never flash while connected to the analyser
Before flashing or updating the Trimix Analyser Connector, disconnect it completely from the Divesoft Trimix analyser. Flash only with USB connected to the ESP32-S3-Zero. Leaving the analyser wiring connected during flashing can backfeed or short signals and may destroy circuits in the adapter or analyser.
What it does
Print readable labels when the dive prep gets busy.
The adapter listens to the analyser connector port documented by Divesoft at 115200 baud, receives O2 and He once per second, calculates MOD and END, and prints a label when you press the button or pause the analyser long enough for pause-to-print.
That means less decoding of buddies' handwriting, fewer half-readable cylinder labels, and a cleaner setup when a team is preparing several stage, deco, or bailout cylinders. Analyse, confirm, print, stick the label on the cylinder.
- Basic Nitrox label printing is available without the Trimix Pro upgrade.
- Trimix labels include helium percentage and END calculation.
- WiFi setup, printer pairing, owners, history, logs, and OTA are in the Web UI.
- Update-only flashing keeps WiFi, printer, owner, history, and license data.
LED states
- White
- Powered on or idle
- Green
- WiFi connected
- Green blink
- Setup AP active
- Yellow
- Pause-to-print countdown
- Blue blink
- Connecting to printer
- Blue
- Transmitting label data
- Red blink
- Recoverable connection or print error
- Red
- Software or resource fault
From reading to label
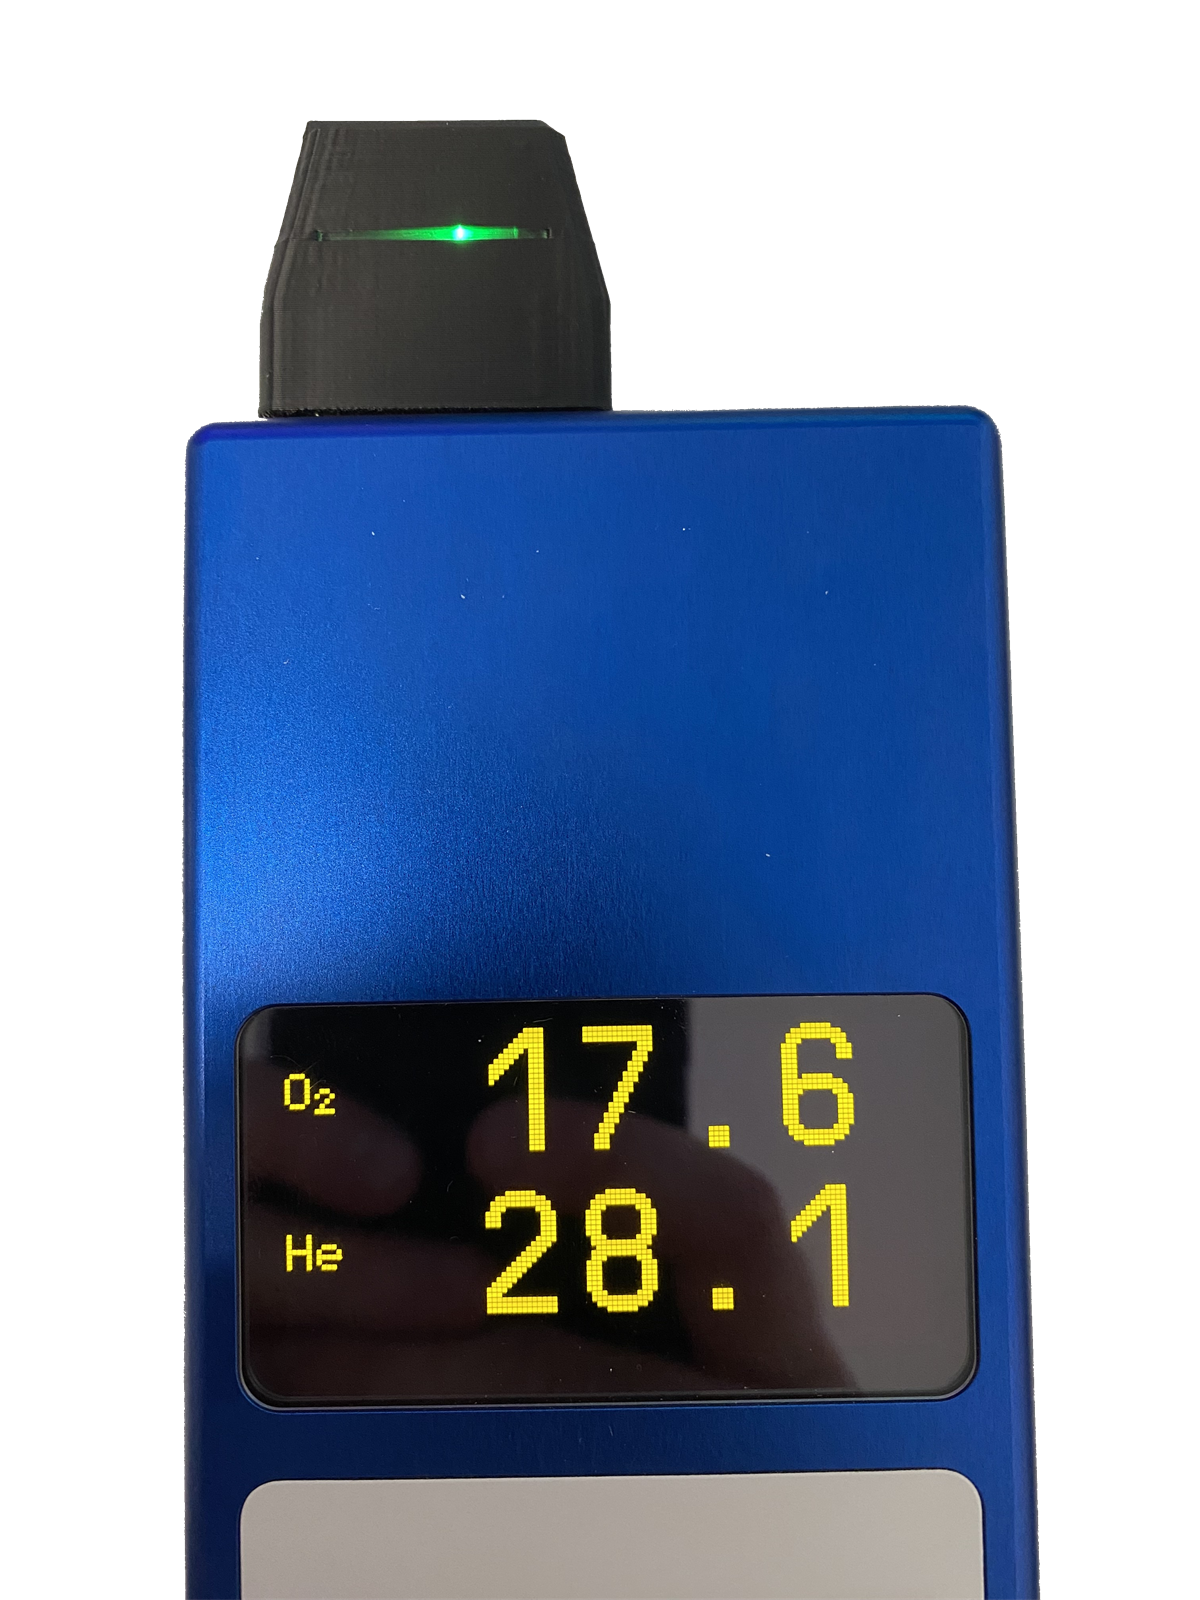
The adapter sits on the analyser and turns confirmed readings into a printed sticker.
The analyser remains the source of truth. The adapter listens to the serial reading, shows what it is receiving, and sends the finished gas label to the paired Niimbot printer when you trigger printing.
- Live O2 and helium values are visible while the adapter is connected.
- Printed labels include mix, MOD, END, date, and owner initials.
- The workflow stays physical and checkable: analyser display first, label second.
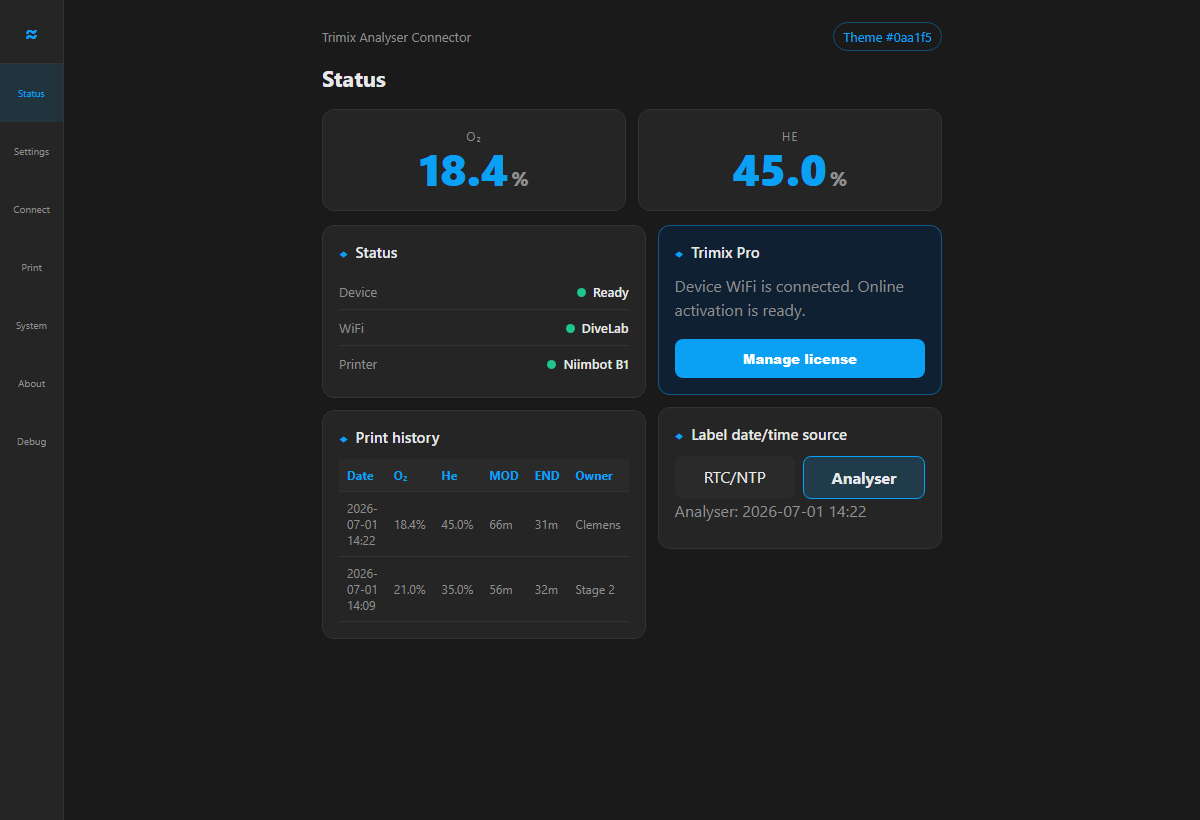
Device Web UI
Set up WiFi, pair the printer, manage Pro, and check live readings.
The connector has its own local Web UI with the same blue theme as this site. Use it for printer setup, WiFi, owners, print history, label date/time source, OTA updates, diagnostics, and Trimix Pro activation.
- Connect device WiFi before online Pro activation.
- Signed entitlements remain offline-capable after setup.
- Live O2 and He values make it easy to verify what the adapter receives.
Shopping list
Parts for the Trimix Analyser Connector
We provide firmware and the installer. You source the electronics, make the Divesoft cable, flash the board from the website, pair your printer, and verify the first labels carefully. You do not need to compile code or install developer tools.
| Qty | Part | Purpose |
|---|---|---|
| 1 | ESP32-S3-Zero (Waveshare or similar) | Main ESP32-S3 board with USB-C. |
| 1 | Momentary push button | Manual print trigger. |
| Optional | DS3231 Mini RTC module | Only needed for older Divesoft analyser models that do not provide a built-in clock in the serial output. |
| 1 | 1k to 4.7k resistor | Series protection between Divesoft TXD and ESP32 GPIO4 RX. |
| 1 | Male DVI connector with solder pads | Plugs into the analyser rear connector; solder TXD, GND, and switched 5V to the pads. |
| 1 | Printed housing | Holds the ESP32 board, DVI connector, and print button. |
| 2 | M2.5 screws | Close the printed housing. |
| Optional | Niimbot B1/B21 printer | Bluetooth label output. |
Tools
What you need on the bench
Soldering iron, multimeter, wire cutters, USB-C cable, printed housing, and two M2.5 screws.
Skill level
No coding experience required
Flash via the website, solder the DVI connector and button, pair the printer, then verify every printed label.
Assembly and soldering
Trimix Analyser Connector pinout
This uses the Divesoft rear connector serial output documented for the analyser. It only listens to the analyser TXD line and sends label data to the Niimbot printer over Bluetooth. Disconnect the adapter from the analyser before every USB flash or update.
| Connection | ESP32-S3-Zero pin | What to solder |
|---|---|---|
| Divesoft TXD | GPIO4 RX | Divesoft rear connector pin 4 through a 1k to 4.7k series resistor. |
| Divesoft GND | GND | Divesoft rear connector pin 14 or 15 to ESP32 ground. |
| Divesoft 5V | 5V | Optional power from rear connector pin 13, switched by the analyser power state. |
| Print button | GPIO7 and GND | Momentary push button to ground; firmware uses the internal pull-up. |
| Optional RTC SDA | GPIO1 SDA | DS3231 SDA, only for older analyser models without a built-in clock. |
| Optional RTC SCL | GPIO2 SCL | DS3231 SCL, only for older analyser models without a built-in clock. |
| Optional RTC power | 3.3V and GND | Power the DS3231 from 3.3V, not 5V. |
- The ESP32 receives on GPIO4 only; GPIO5 TX is configured but not used by the adapter wiring.
- The series resistor protects the ESP32 input if the line is miswired, backfed, or above 3.3V.
- Measure the DVI solder-pad pins before final assembly.
Wiring diagram
Listen to the documented analyser connector port.
The adapter receives serial data from the analyser TXD line through a small series resistor and shares ground with the analyser. Unplug the adapter from the analyser before every USB flash or update so USB power cannot backfeed the analyser connector.

Printed housing
Printed enclosure for the adapter.
Use the supplied 3MF case file from the product download package for the final adapter housing. Print the housing, fit the electronics, and close it with two M2.5 screws.
3MF case file included in the software packageSimple build path
Build it in five steps
- Prepare the cable. Use Divesoft TXD pin 4, GND pin 14 or 15, and switched 5V pin 13 if powering from the analyser.
- Add input protection. Place a 1k to 4.7k series resistor between Divesoft TXD and ESP32 GPIO4 RX.
- Wire the module. Use the pinout above to connect the print button to GPIO7 and GND, wire common ground everywhere, and add the optional RTC only for older analyser models without a built-in clock.
- Flash the firmware. Disconnect the adapter completely from the Divesoft Trimix analyser before flashing. Then connect only the ESP32-S3-Zero by USB, open the installer in desktop Chrome or Edge, and choose full install for a new board.
- Set up and test. Connect WiFi, pair the Niimbot printer, check live readings, and verify printed labels against the Divesoft display.
Cost before you install
Nitrox labels are basic. Trimix labels are Pro.
We do not sell the Divesoft analyser, ESP32 board, cable, printer, or finished adapter. You source and build the hardware. Basic Nitrox labels are free; Trimix label printing is the Pro upgrade, so know this before activating the adapter. Public checkout opens with the release in a few days.
Helium/Trimix label printing, MOD/END output, and offline-capable signed activation.
Basic Nitrox label printing remains the plan. Trimix Pro checkout and activation will open after the production payment and firmware release flow are final.
USB flashing
The browser installer opens in a few days
Use update-only for existing devices so settings and licenses stay intact. Use full install for new boards, recovery, unknown firmware, or partition-layout changes. The public installer opens after the final release build and production payment flow are verified.
- Use desktop Chrome or Edge.
- Disconnect the adapter completely from the Divesoft Trimix analyser.
- Connect only the ESP32-S3-Zero to the computer by USB.
- Select Trimix Analyser Connector and the install mode.
- Follow the release email when the installer is opened publicly.
Important safety note
The adapter copies readings from the Divesoft analyser and prints them. It does not make the gas analysis safer by itself. Always verify the analyser display, gas mix, date, MOD/END, and printed label before diving.